Wednesday, February 27, 2013

Climbing Events March & April 2013

2/27 - 2/28 -- Santa Barbara, CA -- Banff Mountain Film Festival at UCSB Arlington Theater


2/28 -- Portland, OR -- Snowbash NWAC and FOAC fundraiser party

3/3 -- Santa Barbara, CA -- National Geographic Live: Borge Ousland's Polar Exploration

3/8 - 3/10 -- Kirov, Russia -- UIAA Ice Climbing World Cup - Lead and Speed & Speed World Championship

3/9 -- Boise, ID -- Buck Off Climbing Competition

3/9 -- Crystal Mountain, WA -- Dynafit and Crystal Mountain Nachtspektakel

3/22 - 3/24 -- Mt. Baker, WA -- Splitfest (Splitboard Festival)

4/5 --Seattle, WA -- NWAC Snowball Dinner and Auction

4/5 - 4/7 Las Vegas, NV -- Red Rock Rendezvous

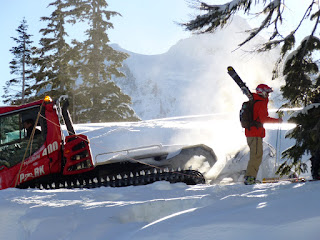
There are at least 4 Alpine Institute Guides in this video, Andrew Yasso, Paul Rosser, Tom Kirby, and Ben Gardner. Who do you know?


4/13 --Seattle, WA -- The Rain City Send Climbing Wall comp at UW

4/6 -- San Angelo, TX -- Angelo State University Climbing Competition

3/15 - 5/4 -- Bay Area, CA -- http://www.touchstoneclimbing.com/comps

  • Friday, March 15th, 2013 • Concord Diablo Rock Gym • 5pm-10pm
  • Friday, April 19th, 2013 • Oakland Great Western Power Co • 5pm-10pm
  • Saturday, May 4th, 2013 • Mission Cliffs in San Francisco •


Tuesday, February 26, 2013

Coleman Pinnacle Ski Tour

Everybody was psyched for the day.

On February 19th I finished a month on the road and returned to the Pacific Northwest, finally ending my journey just after midnight.  Contrary to expectations as I drove over Snoqualmie Pass, fueled by loud music and gas station coffee, the weather was not grey and misty.  Instead I was greeted by clearing skis, a half moon, and what appeared to be awesome snow conditions.  I pulled over and proceeded to bother every Northwest ski partner I could think of.  Finally my friend Boe up in Bellingham gave me the desired response and I made the extra hour and a half drive up I-5.  After a couple hours of sleep and more caffeine we got to the backcountry lot at Mt. Baker Ski Area.  

Conditions were better than expected.     

Conditions were perfect.  Clear skis, cool temps, and good snow.
We started skinning out of the parking lot around 9am with the goal of heading out towards the Coleman Pinnacle, which is a high point along Ptarmigan Ridge.  After what seemed like a quick and easy skin we transitioned below Table mountain. Our planned route took us under the south face of Table and we were glad to be crossing this slope early in the day. 

First run.  Photo: Boe Trosset
 South Face of Table

We continued to traverse out towards the Coleman Pinnacle with great snow conditions.  Snow on north aspects had faceted throughout the night creating some pretty good skiing conditions.  In order to take advantage of these conditions we decided to sneak in an extra run on the way to the Pinnacle.  While my legs did not thank me at the end of the day, it was worth it.


Run 2

The skiing was ok...Photo by Boe Trosset
After some of the better skiing I have had in a while, we put skins on, enjoyed some lunch, and continued on towards the Pinnacle.   Eventually our objective was in sight.


Getting to the top was steeper than expected and we were forced to work on our bootpacking skills. Notice Boe's upside down ski pole handle anchor technique. 


Skinning off the top of the Pinnacle has been something I've wanted to do for a while and conditions were great.  After some steeper rolls on the upper ridge we were able to drop into the north slope we skinned/booted up.
Boe riding the upper ridge.
Lower down on the slope that we booted up we had a concern about wind loading.  We were able to ski cut a small roll which produced a small wind slab.  Ski cutting is a rather advanced technique, make sure you have the proper instruction before attempting it in the field.   

Crown of the slide.
After some more stellar skiing we began the long haul to the Herman Saddle.  Due to dwindling energy and battery power my propensity to shoot photos declined but Boe was able to motivate and take some stellar shots of the sunset.   

Photo: Boe Trosset
The ski from Herman Saddle to the car was pretty brutal.  The sun had its way with much of the slope and except for a couple hidden stashes of decent snow, it was a bone jarring ice fest back to the car.

Overall it was a great first day back in the northwest.
Our route
--Dustin Byrne

Monday, February 25, 2013

Retrievable Fixed Line


Canyoneering tricks are often extremely applicable to rock and alpine climbing. The little trick featured in this video could easily be used by a party setting up a toprope on a sketchy edge or -- as in the video -- by a party rigging a rappel on a weird lip.

This technique is most applicable with a larger group that needs a fixed line. With a small group, the first climber could just belay the second climber down to him after building the anchor.

The crux of this trick is played out in the video very quickly. Watch closely at the 1:50 second mark.


I'm not sure I'm that excited about the ratty sling and the quicklink shown in the video. It is really important to make sure that your anchor is completely solid.

In review, the steps are as follows:
  1. Belayer belays climber out to edge.
  2. Climber at edge builds an anchor and fixes the line.
  3. The climber at the top converts the line by running it through the quicklink and clipping a carabiner to a clove-hitch on the backside. This could also be done by running the rope around a tree or a boulder. If you do it through a tree or a boulder, be sure that there isn't too much friction and that the line could still be retrieved.
  4. Once the line is fixed on both ends, a climber could clip in with a sling to a carabiner to descend or the climber could put a friction hitch on the rope. A friction hitch would provide a higher level of security.
  5. Only one person should move on the fixed line at once.
  6. The last person will bring down the backside of the fixed line, the end that is not running through the quicklink.
  7. Once the rope is released from the anchor, it will be able to be easily pulled down.
--Jason D. Martin

Saturday, February 23, 2013

Weekend Warrior - Videos to get you STOKED!!!

The folks at Salomon have done it again, with another great episode of their Freeski TV.  With an overwhelming number of forest fires in the summer of 2012, those slopes have now become wide-open playgrounds for skiers this winter.  This video highlights not only some great skiing, but the tragedy of the burns and eventual triumphant return of the forest.


We've all heard the analogy of a calm, smooth lake looking like a sheet of glass, right?  Well how about actually snowboarding on a sheet of glass - literally!  This next video from the folks at networkA and Signal Snowboards comes from their Every Third Thursday series, where they come up with crazy new prototypes for snowboards - some that work, and some that don't.  The fun is in coming up with the idea and trying to execute it.  With this episode, the crew travels to Italy to build a glass snowboard and in the end they get some surprising results.


Two weeks ago, Mt. Baker Ski Area hosted it's 28th Annual Legendary Banked Slalom, the longest running snowboard competition in the US.  This event draws some of the biggest names in the snowboarding world, with both industry legends and rising stars converging at this event.  This next clip gives you all a glimpse of this amazing event.


Legendary Mt. Baker Banked Slalom 2013 from Snowboarder Magazine on Vimeo.

Mt. Baker is getting dumped on this week, with close to a foot and a half estimated for Friday morning - just that morning!  Let's hope a Weekend Warrior gets out there and grabs some amazing footage!

Have a great weekend! - James

Wednesday, February 20, 2013

Climbing Events - February & March 2013


2/23 -- Dallas, TX -- SMU Pulldown Climbing Wall Competition

2/23/2013 -- Atlanta, GA -- Rock & Rave Fundraiser (with Sharma, Florine, Smith and more)

2/24 -- Ashland, OR -- Emigrant Lake Adopt a Crag

2/27 - 2/28 -- Santa Barbara, CA -- Banff Mountain Film Festival at UCSB Arlington Theater

Tuesday, February 19, 2013

Ice Anchors - Part II


So Part 1 showed how to make ice anchors with two screws. Part 2 will show you how to make ice anchors in more complicated scenarios. Let's get to it.

How to Make a 3-Screw Anchor

Sometimes you want an extra screw for security. It could be because the ice itself is not that strong and you want another anchor point to add to the mix. It could also be that you only have shorter screws, which can sometimes leave you wanting another piece.

The process itself is quite similar to a 2-screw anchor. Place three screws in the ice, ideally about one foot away from the others. it is best to offset the screws a bit on both vertical and horizontal planes. Clip a carabiner to each screw, and clip in your anchor material. A triple-length sling or cordalette works really well with 3-screw anchors.


And then tie your figure-8 knot. Make sure to keep the cordalette's knot (the one shown in the upper left) away from the figure-8 knot:


And clip in your master 'biner (always a locker):


How to Make a V-thread and Screw Anchor

Sometimes you may want to add in a V-thread to your anchor. I use this especially in the summer on glaciers on Mt. Baker, where we toprope for hours in the hot July sun. Screws can melt out quite quickly in this case because they conduct heat. So I'll often make a V-thread to add to an anchor. Sometimes I'll even do an anchor with two V-threads, but I'll show just one V-thread and one ice screw:


To make this anchor, do a V-thread (see a following blog for how to make V-threads) and put in a screw. Again, make the screw up and to one side of the V-thread. Clip a carabiner to each piece. Clip in your anchor material (shown is a 48" runner). Tie your figure-8 knot to create a masterpoint and clip in your master locker. Voila! A similar setup can be used to backup a V-thread for rappels. Stay tuned to the blog for more info about how to do this.

--Mike Pond, instructor and guide.

Monday, February 18, 2013

Ice Anchors - Part I

There are loads of different types of anchors, but they all use the same fundamental strategy: connect multiple, sound points of protection together to use their combined strength and redundancy to make a unified anchor. In this series, we'll look at different anchors you can make on ice. In Part 1 (the current entry) we'll do a basic 2-screw anchor. Part 2 will deal with other types of ice anchors.

I took these pictures during a recent course in Ouray, Colorado, where we practice making different types of anchors on ice. Note that these are all on water ice, not glacier ice. The two are different at times in character, but we use the same principals for anchors.

Step 1: Find a safe location with bomber ice.

Ice climbers send down some shrapnel! Make sure that you're out of the way to avoid getting hit. This usually means going to the side of an ice flow or hunkering down under an overhang.

Step 2: Find good quality ice for anchor.

Good ice is not fractured, hollow, or aerated, and is attached to whatever it's on (usually rock). It's a little difficult to describe exactly, but this part is fairly intuitive.

Step 3: Place the first screw.

Locate a place that the ice is fairly flat. If there are any protruding points of ice, feel free to use the adze or pick of your ice tool to knock them out to make the surface smooth. You'll want about a 10-inch diameter to allow the ice screw to rotate completely around. The angle of the screw should be roughly perpendicular to the surface of the ice. If anything, have it go just slightly (less than 10-degrees) downward. Drive the screw on home!


Step 4: Place the second screw. 

Locate a place at least one foot away from the first screw, ideally up and to the side. Rumor has it that ice fractures along it's horizontal and vertical axes, so if you put the screw in up and to one side it should avoid that potential problem. (I have never even seen an ice screw fracture ice, let alone break it, so I cannot fortunately, say from personal experience on this one).


Step 5: Clip a carabiner to each ice screw.

I usually use wire-gate non-locking biners.

Step 6: Clip your anchor material to each biner.

You can use a double-length (48") sling, which seems to be the perfect length for ice anchors. You can, of course, use a cordelette, or triple-length sling as well.


Step 7: Tie your figure-8 knot to create a master-point.


Step 8: Attach your lockers, and belay on!

See Part 2 to see ways to make ice anchors on more complex terrain.

--Mike Pond, Instructor and Guide